Home Gardening Ideas Using Recycled Supplies

Gardening is a great way to beautify your home and provide fresh, organic produce for your family. But gardening can also be expensive, especially if you’re starting from scratch. Luckily, there are many creative ways to use recycled supplies found around the house to create a beautiful and functional garden.

Let’s explore some home gardening ideas that use recycled supplies, including sprouting seeds in paper towel or toilet paper rolls, creating garden beds with old pallets, and using old coffee grounds as fertilizer.

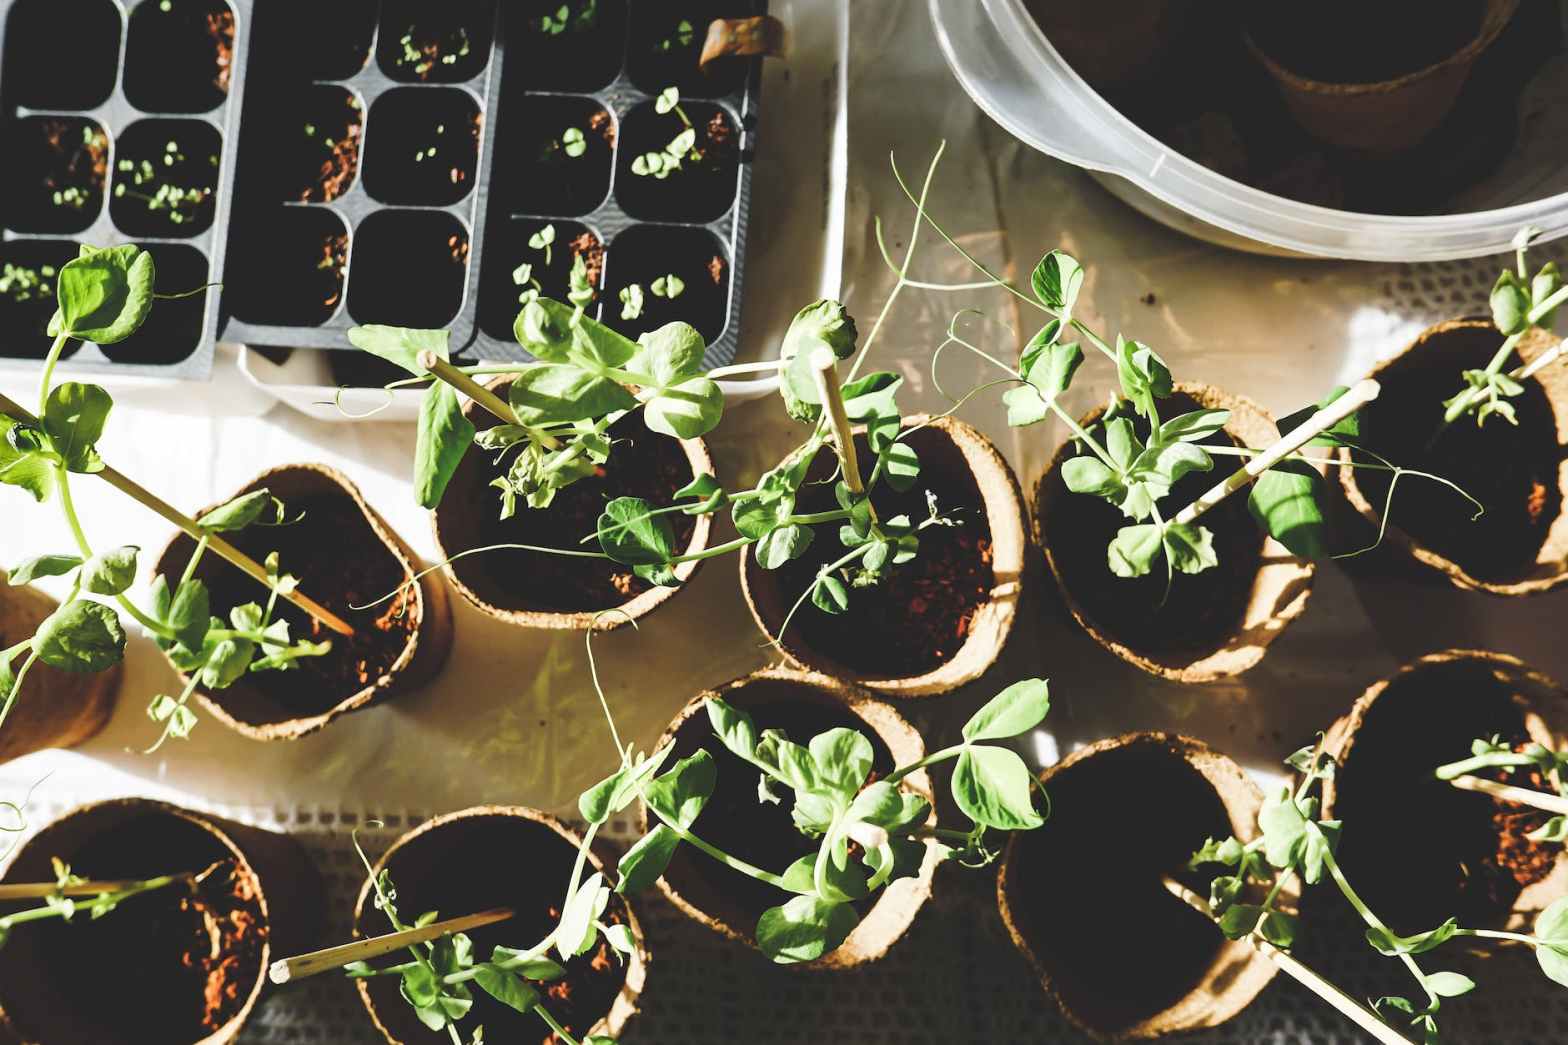
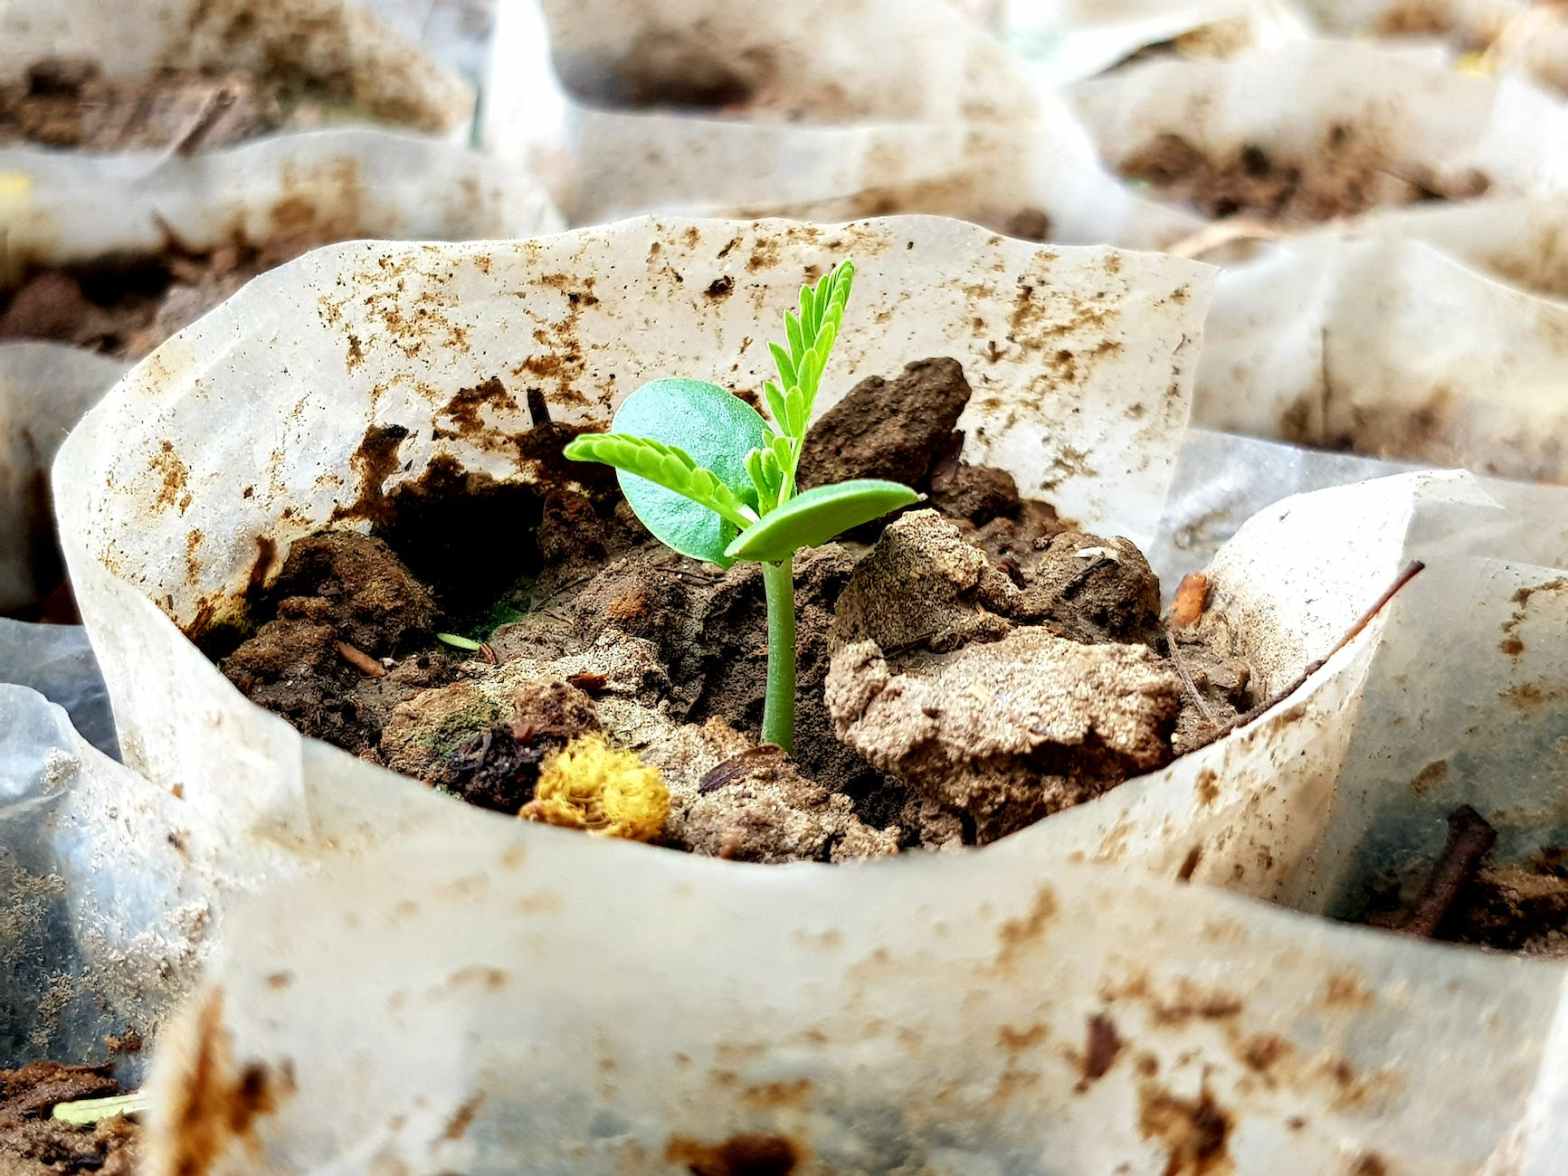
Sprouting Seeds in Paper Towel or Toilet Paper Rolls

Starting seeds can be a challenge, especially if you don’t have a lot of space or money to invest in expensive seed starting trays. One creative solution is to use recycled paper towel or toilet paper rolls as a seed starter.

To get started, simply cut the paper towel or toilet paper roll in half, fill it with soil, and plant your seeds. The cardboard will decompose over time, providing nutrients to the growing plant. This is a great way to start seedlings indoors, and the rolls can be planted directly in the ground once the seedlings are large enough.

Creating Garden Beds with Old Pallets

Garden beds are a great way to create a neat and organized garden, but buying materials can be expensive. One solution is to use old pallets to create garden beds.

To make a garden bed from a pallet, start by removing any loose or damaged pieces of wood. Then, fill the pallet with soil and compost, and plant your seeds or seedlings. This is a great way to create a small herb garden or flower bed, and the pallets can be stacked to create larger beds.

Using Old Coffee Grounds as Fertilizer

Coffee grounds are a great source of nitrogen, which is essential for plant growth. Instead of throwing your old coffee grounds in the trash, use them to fertilize your plants.

To use coffee grounds as fertilizer, simply sprinkle them around the base of your plants, being careful not to cover the leaves. Coffee grounds can also be mixed with soil and compost to create a nutrient-rich planting mix.

Other Ideas for Recycling Household Items in Gardening

There are many other ways to recycle household items in gardening, including:

  • Using eggshells as a natural pest deterrent
  • Turning old containers into planters
  • Using old sheets or curtains as frost protection
  • Creating a rain barrel from an old trash can or barrel

With a little creativity and resourcefulness, you can turn your home into a thriving garden. These home gardening ideas using recycled supplies will not only save you money but also reduce waste and help the environment.

Gardening doesn’t have to be expensive or wasteful. By using recycled supplies found around the house, you can create a beautiful and functional garden that’s both environmentally friendly and cost-effective. From sprouting seeds in paper towel rolls to creating garden beds with old pallets, these home gardening ideas are sure to inspire your next gardening project.

Eco-Friendly Gardening: How to Create a Sustainable Garden with Recycled Cardboard

Garden beds can be a great way to grow fresh produce at home, but setting them up can be a challenge. One simple and sustainable solution is to use recycled cardboard as a weed barrier, topped with compost. This method not only saves money and reduces waste, but also creates a healthy environment for plants to grow.

Why use cardboard and compost for garden beds?

Using cardboard as a weed barrier in garden beds has several benefits. Cardboard is biodegradable and is an effective weed suppressant, preventing sunlight from reaching the weeds and hindering their growth. In addition, compost provides essential nutrients and improves soil quality for plants to thrive. By using recycled cardboard and compost, you can create a sustainable and eco-friendly garden bed that is both cost-effective and easy to set up.

Steps to set up garden beds using cardboard and compost:

  1. Choose the location: Identify a suitable location for your garden bed. Choose an area with sufficient sunlight and easy access to water.
  2. Gather supplies: Collect cardboard boxes and compost material. You can use any type of cardboard, but make sure to remove any tape, staples or plastic coatings. Compost can be purchased or made at home using organic waste such as food scraps, leaves, and grass clippings.
  3. Lay down cardboard: Flatten the cardboard boxes and overlap them to cover the entire area of the garden bed. The cardboard should be at least two layers thick to effectively suppress weeds.
  4. Water the cardboard: Soak the cardboard with water to help it conform to the ground and prevent it from shifting.
  5. Add compost: Add a layer of compost on top of the cardboard. The compost should be at least three inches thick to provide enough nutrients for the plants.
  6. Mix the soil: Mix the compost with the existing soil using a garden fork or tiller. This will create a healthy soil mixture for plants to grow.
  7. Plant the garden: Once the soil is prepared, plant your favorite fruits, vegetables, or flowers. Water the plants regularly and add additional compost as needed.

Maintenance tips for garden beds using cardboard and compost:

  • Water regularly: Make sure to water the garden bed regularly, especially during hot and dry weather.
  • Add more compost: Add additional compost to the garden bed as needed to provide nutrients for the plants.
  • Monitor for weeds: While the cardboard should effectively suppress weeds, monitor the garden bed regularly for any weeds that may sprout.
  • Renew the cardboard: Over time, the cardboard may break down and lose its effectiveness as a weed barrier. Replace the cardboard as needed to maintain a healthy garden bed.

Setting up a garden bed using cardboard and compost is a simple and sustainable solution that can benefit both your wallet and the environment. With a little effort and regular maintenance, you can grow fresh and healthy produce right in your own backyard.

From Lawn to Garden: How to Transform Your Dead Leaves into Nutrient-Rich Soil

Leaves are a natural and important part of any ecosystem, providing vital nutrients to the soil and supporting the growth of healthy plants. But when fall comes around, many homeowners find themselves with a lawn full of dead leaves and wonder what to do with them. Should you rake them up and dispose of them or leave them to compost into the soil?

Here’s what you need to know about leaves and how to manage them:

Why Leaves are Important

Leaves are a valuable source of organic matter and essential nutrients for soil health. As leaves decompose, they release nutrients such as nitrogen, phosphorus, and potassium back into the soil, which can benefit plant growth. Leaves also act as a natural mulch, helping to retain moisture and regulate soil temperature. This can be especially important during the winter months, when exposed soil can be vulnerable to erosion and freeze-thaw cycles.

Should You Rake Your Leaves in the Spring?

Raking leaves in the spring can be a contentious issue among gardeners and homeowners. On one hand, raking can help to tidy up the lawn and promote healthy grass growth. On the other hand, leaving leaves to decompose naturally can be beneficial for soil health and biodiversity.

So, what should you do? The answer depends on several factors, including the amount of leaves on your lawn, the type of grass you have, and your personal preferences. Here are some things to consider:

  • If you have a thick layer of leaves that is smothering your grass, you may want to consider raking or using a mulching mower to shred the leaves into small pieces.
  • If you have a thin layer of leaves that is not affecting your grass growth, you may want to leave them to decompose naturally.
  • If you have a mix of deciduous and evergreen trees, you may want to rake up the deciduous leaves and leave the evergreen needles, which decompose more slowly and can create an acidic soil environment.

The Benefits of Composting Leaves

Composting leaves can be a great way to reduce waste and improve soil health. When leaves are composted, they break down into a nutrient-rich soil amendment that can be used to improve soil structure and fertility. Composting can also help to reduce greenhouse gas emissions by diverting organic waste from landfills.

To compost leaves, simply pile them up in a designated compost bin or area and let them decompose over time. You can speed up the process by shredding the leaves into smaller pieces or mixing in other organic materials such as grass clippings, vegetable scraps, or coffee grounds. As the leaves decompose, be sure to keep the pile moist and turn it occasionally to promote aeration and even decomposition.

What to Do with a Lawn of Dead Leaves

If you have a large lawn of dead leaves, you may be wondering what to do with them. Leaving them to decompose naturally can be a good option, but it can also take several months or even years for the leaves to break down completely.

Another option is to use a leaf blower or rake to pile the leaves into a corner of your yard or garden, creating a natural habitat for wildlife. The leaves can also be used as a mulch around trees, shrubs, and garden beds, helping to retain moisture and suppress weeds.

In conclusion, leaves are an important part of any ecosystem and can be a valuable source of organic matter and essential nutrients for soil health. While raking leaves in the spring may be necessary in some cases, leaving leaves to decompose naturally or composting them can be a great way to reduce waste and support a healthy garden. By managing your leaves in a responsible way, you can help to create a healthy and sustainable landscape.

Biscuits: The Perfect Accompaniment to Michigan’s Freshest Produce in Any Meal

Biscuits are a staple comfort food that can be eaten for breakfast, lunch, dinner or dessert. A good biscuit recipe can add depth and texture to any meal. Combining the goodness of locally grown Michigan produce with a good biscuit recipe can take your meals to the next level.

Here are seven different meals where a biscuit can enhance the flavor experience:

1. Biscuits and Berries

Fresh Michigan berries are a summertime treat. Pair them with a homemade biscuit and whipped cream for a perfect dessert or breakfast. Use the biscuit as a base, slice it in half and top it with fresh berries and whipped cream.

2. Biscuit and Gravy

A classic Southern dish, biscuits and gravy can be made with Michigan-grown pork sausage and fresh herbs. Make a roux with flour, milk and spices, add cooked sausage and serve over a freshly baked biscuit.

3. Biscuit and Fried Chicken

Using locally grown chicken, marinate it overnight in buttermilk and seasonings, then fry it to crispy perfection. Pair it with a homemade biscuit and a side of collard greens for a classic Southern meal.

4. Biscuit Pizza

Top a biscuit with fresh tomato sauce, locally grown veggies like peppers, mushrooms and onions, and cheese for a quick and delicious pizza. Bake in the oven until the cheese is melted and bubbly.

5. Biscuit Pot Pie

Using Michigan-grown root vegetables like carrots, potatoes and turnips, make a savory pot pie filling with chicken or beef. Top the filling with a biscuit crust and bake in the oven until golden brown.

6. Biscuit Cobbler

Use your biscuit dough to top a fruit cobbler or crisp for a unique and delicious dessert.

7. Biscuit Bread Pudding

Use your leftover biscuits to make a rich and flavorful bread pudding by mixing them with milk, eggs, and sugar and baking until set.

Biscuits can be used in a variety of ways to enhance the flavor of locally grown Michigan produce. From breakfast to dinner, a good biscuit recipe can make all the difference.

10 Surprising Uses for Maple Syrup

Maple syrup is a versatile and delicious ingredient that can be used in more ways than just on top of pancakes or waffles. Here are 10 surprising uses for maple syrup that you might not have considered before.

1. Glazing for meats and vegetables

Maple syrup can be used as a glaze for meats and vegetables to give them a sweet and savory flavor. Simply mix together maple syrup, soy sauce, and a dash of garlic and brush it onto your desired protein or veggie before cooking.

2. Cocktail sweetener

Maple syrup can be used as a natural sweetener in cocktails, providing a rich and complex flavor. Use it in place of simple syrup or honey for a unique twist on classic cocktails like an Old Fashioned or a Whiskey Sour.

3. Salad dressing

Maple syrup can be used to add a sweet and tangy flavor to homemade salad dressings. Mix together maple syrup, olive oil, apple cider vinegar, and Dijon mustard for a delicious vinaigrette.

4. Ice cream topping

Maple syrup can be drizzled over ice cream for a delicious and indulgent treat. Try it on top of vanilla ice cream with some chopped nuts and a sprinkle of sea salt.

5. BBQ sauce

Maple syrup can be used as a base for homemade BBQ sauce, adding a unique and delicious flavor. Mix together maple syrup, ketchup, apple cider vinegar, and spices for a sweet and tangy sauce.

6. Marinade

Maple syrup can be used as a base for marinades, helping to tenderize and flavor meats. Mix together maple syrup, soy sauce, garlic, and ginger for a tasty marinade for chicken, pork, or beef.

7. Baking ingredient

Maple syrup can be used as a substitute for other sweeteners like sugar or honey in baking recipes. It adds a depth of flavor and sweetness that other sweeteners can’t match.

8. Facial mask

Maple syrup can be used in a DIY facial mask to help hydrate and nourish the skin. Mix together maple syrup, honey, and plain yogurt for a moisturizing and rejuvenating mask.

9. Hair mask

Maple syrup can be used in a DIY hair mask to help add shine and moisture to dry or damaged hair. Mix together maple syrup, coconut oil, and avocado for a nourishing and hydrating hair treatment.

10. Energy booster

Maple syrup can be used as a natural energy booster, providing a quick source of glucose to the body. Mix together maple syrup, water, and a pinch of sea salt for a homemade sports drink that will keep you fueled during your workout.

Maple syrup is not just a topping for pancakes and waffles, it is a versatile ingredient that can be used in many different ways to add flavor and nutrition to your meals, drinks, and even beauty routine. Try out these 10 surprising uses for maple syrup and see how this delicious and natural sweetener can enhance your life in new and unexpected ways.

Don’t Risk Your Safety: A Comprehensive Guide to Tree Trimming Safety

Spring is the time for trimming trees, chopping wood, and getting ready for the warmer months ahead. However, it’s important to prioritize safety when taking on these tasks. The following are some essential safety tips to keep in mind when using a chainsaw or chopping wood for spring cleanup chores.

  1. Wear proper protective gear: Always wear protective clothing, including gloves, eye protection, sturdy boots, and a hard hat. Chainsaws can kickback and cause serious injury, so wearing protective gear is a must.
  2. Keep your chainsaw in good condition: A well-maintained chainsaw is essential for safe operation. Keep your chainsaw sharp and in good condition, with all safety features in place and working properly. Always follow the manufacturer’s instructions when using your chainsaw.
  3. Plan your cuts: Before you begin, take a few minutes to plan your cuts. Look for any hazards, such as power lines or uneven terrain, and identify an escape route in case of an emergency. Always make sure you have a clear path to retreat if necessary.
  4. Know your limits: Don’t push yourself too hard when chopping wood or using a chainsaw. Take frequent breaks, stay hydrated, and be aware of your physical limitations. If you feel tired or uncomfortable, it’s time to take a break.
  5. Practice safe cutting techniques: Always keep your hands and feet away from the cutting area of the chainsaw. Make sure you have a firm grip on the chainsaw, and keep both hands on the handles at all times. Don’t overreach or stand on unstable surfaces when using a chainsaw.
  6. Use the right tool for the job: Different types of wood require different types of saws. Make sure you have the right saw for the job, and always use it as directed. Don’t try to force a saw that’s not designed for the type of wood you’re cutting.
  7. Don’t work alone: It’s always safer to work with a partner, especially when using a chainsaw. Make sure your partner is aware of the safety hazards and knows how to operate the chainsaw safely.

By following these safety tips, you can enjoy a safe and productive spring cleanup season. Remember, when it comes to using a chainsaw or chopping wood, safety should always come first.

5 Quick Tips To Get Your March Gardening Off On The Right Foot

March is a crucial month for gardeners as it marks the beginning of the planting season. However, it’s important to know what to plant and how to plant it to ensure a bountiful harvest. Here are some tips that can help you get started on your garden this March.

  1. Start with cool-season crops. Cool-season crops like lettuce, spinach, kale, and other leafy greens are ideal for planting in March. These crops can tolerate cooler temperatures and will be ready for harvest within a few weeks. They thrive in temperatures between 40-75°F and will bolt (go to seed) when exposed to temperatures over 80°F.
  2. Plant your warm-season crops. Once the soil has warmed up, usually around mid-March, it’s time to plant your warm-season crops. These include tomatoes, peppers, squash, and cucumbers. It’s essential to wait until the soil temperature is at least 60 degrees Fahrenheit before planting to ensure that the seeds germinate.
  3. Prepare your soil. Before planting, prepare your soil by adding organic matter like compost or manure. This will help the soil retain moisture, promote root growth, and provide nutrients to the plants. Turn the soil and add 2-3 inches of organic matter, then mix it in with the soil to a depth of 6-8 inches.
  4. Plant in succession. Planting in succession means planting a few seeds at a time over a period of weeks. This technique ensures that you have a steady supply of fresh produce throughout the season. It’s particularly useful for crops like lettuce and spinach, which have a shorter growing season.
  5. Water regularly. Water your plants regularly, especially during dry spells. Most plants require at least one inch of water per week, either from rainfall or irrigation. Water in the early morning or late evening to reduce evaporation, and water at the base of the plants to avoid wetting the leaves.

By following these tips, you can get your garden off to a great start this spring. However, it’s important to remember that each region has its unique climate and soil conditions, so adjust your planting schedule accordingly. Happy gardening!

Secrets of Fermentation: The Key to Perfecting Your Sourdough

Fermentation is a crucial step in creating delicious sourdough bread. It’s the process by which the yeast and bacteria in the starter culture break down the carbohydrates and proteins in the dough, releasing carbon dioxide and other gases that cause the dough to rise. But fermentation does more than just create bubbles in the bread. Here’s what you need to know:

Fermentation adds flavor

As the yeast and bacteria break down the carbohydrates and proteins in the dough, they create a variety of flavorful compounds, such as lactic and acetic acids. These acids give sourdough bread its distinct tangy taste.

Fermentation changes the texture

The gases released during fermentation create air pockets in the dough, which make the bread light and airy. Fermentation also helps develop the gluten in the dough, which gives it structure and chewiness.

Perfecting your ferment

The key to a good ferment is giving the dough enough time to develop flavor and texture. This can vary depending on the temperature of the environment and the strength of the starter culture. Some tips for perfecting your ferment include:

  • Use a strong starter: A healthy starter culture will have a balance of yeast and bacteria, which will help create a good ferment. You can feed your starter regularly to keep it strong.
  • Give the dough time to rise: Depending on the recipe, you may need to let the dough rise for several hours or even overnight. This allows the yeast and bacteria to do their work and create flavor and texture.
  • Control the temperature: Fermentation happens faster at warmer temperatures, so if you want a slower ferment, you can put the dough in a cooler environment. You can also experiment with different temperatures to see how they affect the flavor and texture of the bread.

Overall, fermentation is a crucial step in making great sourdough bread. By giving the dough enough time to develop flavor and texture, bakers can create bread that is both delicious and satisfying. With a little experimentation and practice, anyone can perfect their ferment and create amazing sourdough bread at home.

Chicken Spotlight: Raising and Maintaining Silkie Chickens

If you’re looking for a unique addition to your backyard flock, consider raising Silkie chickens. These small, fluffy birds are known for their friendly demeanor and docile nature, making them great pets and excellent egg layers. Here’s everything you need to know to get started:

Breeds and Appearance

Silkie chickens are a smaller breed that originated in China. They have black skin and bones, and their feathers are soft and fur-like, rather than the typical smooth, glossy feathers of most chickens. They come in a variety of colors, including white, black, buff, blue, and splash.

Behavior and Care

Silkies are known for their sweet temperament and are great around children. They are also hardy birds and are able to tolerate cold weather well. However, they do need special care, as their feathers are more delicate than other breeds, and they are more prone to feather loss and injuries. Providing a dust bath for your Silkies can help keep their feathers clean and healthy.

Egg Laying

Silkie hens typically begin laying eggs at around 6 months of age. They are not known for being prolific layers, but their eggs are larger than you might expect given their size. On average, a Silkie hen will lay around 100 to 120 eggs per year.

Raising from Chick to Layer Hen

Silkie chicks can take a bit longer to mature than other breeds, typically taking around 6 to 8 months to start laying eggs. They also require a bit more attention when they are young, as they can be more delicate than other breeds. However, with proper care and attention, Silkies can make a great addition to any backyard flock.

In summary, raising Silkie chickens is a rewarding and enjoyable experience. These gentle birds are easy to care for and make great pets, as well as providing delicious eggs. With a little bit of extra care and attention, Silkies can thrive in any backyard or farm setting. So why not consider adding a few to your flock and joining the growing community of Silkie chicken enthusiasts?

Don’t Believe These Common Myths About Raising Chickens on Your Own Farm

Raising your own chickens has become a popular trend in recent years, but it’s also surrounded by a few misconceptions that discourage some people from trying it out.

Let’s look at some of the most common myths about raising chickens and explain why they are not true.

Myth 1: Raising chickens is smelly and dirty

One of the biggest misconceptions about raising chickens is that it’s dirty and smelly. While chickens do produce manure, it can actually be beneficial to your garden when composted properly. Chickens themselves are not smelly, as long as their coop is kept clean and dry. With a little bit of regular maintenance, raising chickens can be just as clean as any other hobby.

Myth 2: You need a lot of space to raise chickens

Another misconception is that raising chickens requires a lot of space. While it’s true that chickens need room to move around, they don’t necessarily need acres of land. Many urban and suburban homesteaders have successfully raised a small flock of chickens in their backyard. There are also several breeds of chickens that are specifically bred for small spaces, such as bantams.

Myth 3: Chickens are noisy and will disturb the neighbors

While roosters can be noisy, hens are relatively quiet animals. In fact, their gentle clucking can be quite soothing. If you’re worried about disturbing your neighbors, simply choose not to raise roosters. Hens will still lay eggs without a rooster, and your neighbors will appreciate the lack of crowing.

Myth 4: Raising chickens is expensive

While there are certainly costs associated with raising chickens, it doesn’t have to be an expensive hobby. You can build a simple chicken coop with recycled materials, and chickens will eat just about anything, including kitchen scraps and garden waste. With a little bit of creativity, raising chickens can actually save you money on eggs and fertilizer.

Myth 5: Raising chickens is difficult

Finally, many people are intimidated by the idea of raising chickens because they think it’s difficult. In reality, chickens are surprisingly low-maintenance animals. They require food and water, a clean coop, and protection from predators. With a little bit of research and preparation, anyone can successfully raise a flock of chickens.

As you can see, raising chickens is a rewarding and fun hobby that can provide you with fresh eggs, fertilizer for your garden, and a sense of satisfaction. Don’t let these misconceptions discourage you from trying it out. With a little bit of knowledge and preparation, anyone can successfully raise a flock of chickens.